

To compile in Scrivener 3, choose File > Compile…, pick a file type in Compile for, click a format in the left sidebar, check that your section types are assigned to layouts with Assign Section Layouts…, and click Compile. Compile turns the documents in your Draft folder into one formatted file: Word, PDF, ePub and more.
This tutorial follows Literature & Latte's own manuals: the Scrivener 3 User Manual for macOS (revision 3.5.2-01) and for Windows (revision 3.1.6.0-02). Section numbers are the manuals' own, so you can look each step up. They match on both platforms except for three Format Designer panes: Windows numbers Separators 24.3, Styles 24.4 and Page Settings 24.19 (24.4, 24.5 and 24.20 on the Mac).
If Compile is already giving you the wrong output, the companion page on fixing Scrivener compile problems goes cause by cause.
What You'll Need
- Scrivener 3 on macOS or Windows. Compile works the same way on both, with a few options that exist only on the Mac (noted below).
- A project with text in the Draft folder. The manual (section 23.1) says "the compiler takes the contents of the 'Draft' folder" and outputs it as a single document.
- Ideally, a project made from a built-in template. The manual says its templates "have been designed with a basic spectrum of types", each already wired to the template's compile settings (section 7.6).
How do I open Compile in Scrivener?
Choose File > Compile…. The shortcut is ⌥⌘E on a Mac and Ctrl+Shift+E on Windows (section 23.1).
The Compile window has three columns, meant to be read left to right (section 23.1):
- Formats, on the left. Which formats show depends on the file type chosen in Compile for at the top.
- Layout preview, in the middle. Tiles show how each kind of document in your draft will look.
- Compile options, on the right. Tabs for Contents, Metadata, General Options, Project Replacements, Cover and, for ebooks, Table of Contents.
The manual's shortest route is the "panic button": click Default in the sidebar, leave Compile for set to Print or PDF, and click Compile. The Default format "will pass through editor formatting" and stitches the draft together with little alteration (appendix D.1).
What does "Compile for" do?
Compile for sets the output file type, and the file type decides which formats appear in the sidebar. The manual's example: choose Plain Text and "you will only see those formats that are useful to this file type" (section 23.2).
The main file types in the manuals' Table 23.1:
| Compile for | Extension | What the manual says |
|---|---|---|
| none | Prints the compiled draft immediately | |
| Opens on nearly any platform with minimal loss of display quality | ||
| Rich Text | .rtf | Scrivener's native format; the manual calls it the best option for most word processor workflows (section 23.5) |
| Microsoft Word | .docx | Preferred for Word and compliant word processors |
| OpenOffice | .odt | For LibreOffice and Google Docs |
| Plain Text | .txt | No formatting |
| Web Page | .html | A single HTML file |
| ePub Ebook | .epub | Uses the ePub 3 specification (now EPUB 3.3, a W3C Recommendation) |
Markdown-based types (MultiMarkdown, LaTeX, Pandoc) appear in Table 23.2. The manual notes that the Pandoc types "will only appear if Pandoc has been installed" and do not appear in the Mac App Store edition. Ebook output has its own walkthrough in exporting Scrivener to EPUB.
What are compile formats?
A compile format is a saved design for the output: fonts, headings, page setup, separators and styles. The sidebar groups them into three lists (section 23.2):
- Project Formats, saved inside the current project only.
- My Formats, saved to your computer and available to every project.
- Scrivener Formats, the built-in ones. These "cannot be deleted or modified directly", but you can duplicate them.
The built-in formats are documented in the manual's appendix D. For a novel, the ones most people use are:
- Manuscript (Courier) and Manuscript (Times) for submission to agents and editors.
- Modern and Paperback (6″ x 9″) for print and PDF.
- Ebook, which the manual calls "a good starting point for your own formats when creating ebook formats" (appendix D.3.1).
- Vellum Export, a Word file meant only for importing into Vellum (appendix D.2.11). That route has its own page.
Built-in formats expect the default style names. The manual says the Modern format "will convert text styled with 'Block Quote' to a suitable font and indent layout" (section 23.2.2). If you renamed your styles, the format will not find them.
What are section types and section layouts?
These two ideas are the core of Scrivener 3's Compile, and the manual keeps them separate.
- A section type describes what a binder item is: a chapter, a scene, front matter. You set it in the Inspector's Metadata tab, in the Outliner's Section Type column, or with right-click > Section Type (section 7.6.2).
- A section layout describes how that type looks when compiled: whether the title prints, the heading design, the numbering, a page break. Layouts belong to the format.
Literature & Latte's Head of Support and Documentation, Ioa (AmberV on the forum), put it this way: types are "simply a way of describing the outline in the binder", while layouts are "how we choose to print Types, when compiling."
Types can be assigned by structure. In Project > Project Settings… > Section Types, the Default Types by Structure tab sets rules such as "level 1 folders are Chapters" (appendix C.2.3). A type shown in grey italic was assigned by structure. A type in black regular text was set by hand (section 7.6.2).
How do I assign section layouts?
- In the Compile window, click Assign Section Layouts… under the middle column.
- On the left, click a section type, such as Chapter.
- On the right, click the layout tile it should use.
- To assign several at once, Shift- or Cmd/Ctrl-click the types, then click one tile.
- Click OK.
The special As-Is layout passes a document's text through "with no additions, embellishments or adjustments" (section 23.3.3). Unused section types are hidden until you click Show Unused Section Types.
A yellow warning above the preview tiles means none of your section types are connected to a layout in this format. The manual says it is "perfectly fine to compile in that state", but the format's look will not be used (section 23.3.3).
To change a layout's design, hover over its tile and click the pencil icon, or double-click the tile. Scrivener duplicates the format if it needs to and opens the Format Designer on that layout (section 23.3.2).
How do I choose what goes into the compiled file?
The Contents tab on the right lists what will compile (section 23.4.1).
- The Compile dropdown at the top sets the compile group. The default is the whole Draft folder. Pick a single folder to export only part of the book.
- The Include column mirrors each document's Include in Compile checkbox in the Inspector. Unticked items are left out.
- The Section Type column shows each item's type, and you can change it right in the list.
- Treat compile group as complete manuscript restarts all counters at 1 when you compile a subfolder. Without it, chapter 13 stays chapter 13.
- The Filter button can include or exclude items by label, status or collection. The manual warns that a puzzling empty list often means a filter "has been left set there from a prior session."
How do I add front matter in Scrivener Compile?
Front matter (title page, copyright, dedication) lives outside the Draft folder, in its own folder, and Compile adds it at the top. The steps from section 23.4.1:
- Create a folder in the binder for front matter, outside the Draft folder. The manual says "you shouldn't place these folders inside the draft folder itself."
- Inside it, make one subfolder per output if you need different sets, for example "Ebook" and "Paperback".
- Move the title page and other pages into those folders.
- In Compile's Contents tab, tick the front matter checkbox and choose the folder from its menu. Back matter works the same way.
- To keep a folder tied to one file type, click the lock icon beside the folder menu. Locked, the "Ebook" front matter stays with ePub while the "Paperback" set stays with PDF.
Front and back matter only compile when the whole Draft is the compile group, or when a subfolder is selected with Treat compile group as complete manuscript ticked. The manual says the Novel template demonstrates a working setup with separate front matter folders for submission, ebook and PDF.
Front matter also feeds other settings. For ebooks, the Cover tab uses "the first graphic found within the designated Front Matter folder" as the cover by default (section 23.4.5). Page headers and footers can be set separately for front matter in the Page Settings pane (section 24.20 on the Mac).
How do I make a custom compile format?
Start from the built-in format closest to what you want, then save your own copy.
- In the Formats sidebar, select the format to start from.
- Click + and choose Duplicate & Edit Format…, or double-click a built-in format, which duplicates it automatically (section 23.2.3).
- Type a Format name at the top of the Format Designer.
- Set Save to: Project Formats keeps it in this project, My Formats makes it available to every project (section 24.1.1).
- Make your changes in the panes: Section Layouts, Separators, Styles, Page Settings and the rest.
- On a Mac, click Test… to run a trial compile. The Mac manual stresses that "testing your settings will not save them" (section 24.1.4). The Windows manual does not document a Test button.
- Click Save.
Two behaviours catch people out. A format saved to My Formats is one shared copy: every project that uses it picks up your changes the next time it compiles. And a project's settings in the Compile window, including layout assignments, are separate from the format.
How do I save compile settings without compiling?
Hold Option (Mac) or Alt (Windows) in the Compile window. The Cancel and Compile buttons change to Reset and Save, and Save keeps your settings without producing a file (section 23.6).
Compile settings are saved into the project whenever you compile or save. The manual says they "cannot be transferred to other projects" (section 23.4). Ioa confirmed on the forum that there is "no way" to import or export layout assignments. The manual's route for reuse is a project template (section 5.4.3).
Cancel is not a full undo either. Changes made to a format itself, "such as adjusting the font of a heading will remain, as Formats are separate from your project" (section 23.6).
To move a format to another computer, select it and choose Export format…, which writes a .scrformat file. To import one, use the sidebar's Import Formats… command, or on a Mac drag the file into the sidebar (section 23.2.5).
Common Mistakes
- Typing "Chapter 1" into folder titles while the layout also numbers chapters. You get the number twice. Change one or the other (see the fix page).
- Skipping Assign Section Layouts after switching formats or starting from the Blank template.
- Putting the front matter folder inside Draft. It then compiles as part of the book in binder order.
- Expecting editor formatting to win. Many built-in formats override the look of stock styles. Ioa's summary: "the compile format has the final say on what a style looks like."
- Clicking Test… and closing the designer. On the Mac, Test does not save.
- Expecting compile settings to carry into a new project. They stay with the project. Use a project template.
Doing the same job in Deckle
Deckle is our app, so weigh this section accordingly.
Deckle has no compile designer. There are no section types, section layouts or format files to wire together. The book's look comes from Styles (View > Toggle Styles), which has 26 built-in presets, and the Inspector's Preview tab shows the result live on Kindle, iPhone, iPad and Print previews as you change a setting. Chapter headings are set in Styles too: chapter numbers can be Arabic, Roman, spelled out or hidden, and the "Chapter" label is a text field.
File > Export… then writes EPUB, PDF or DOCX from that one style, and its Contents tab picks which chapters go out. Front matter is a set of special pages such as Title Page, Copyright and Dedication, not a separate folder.
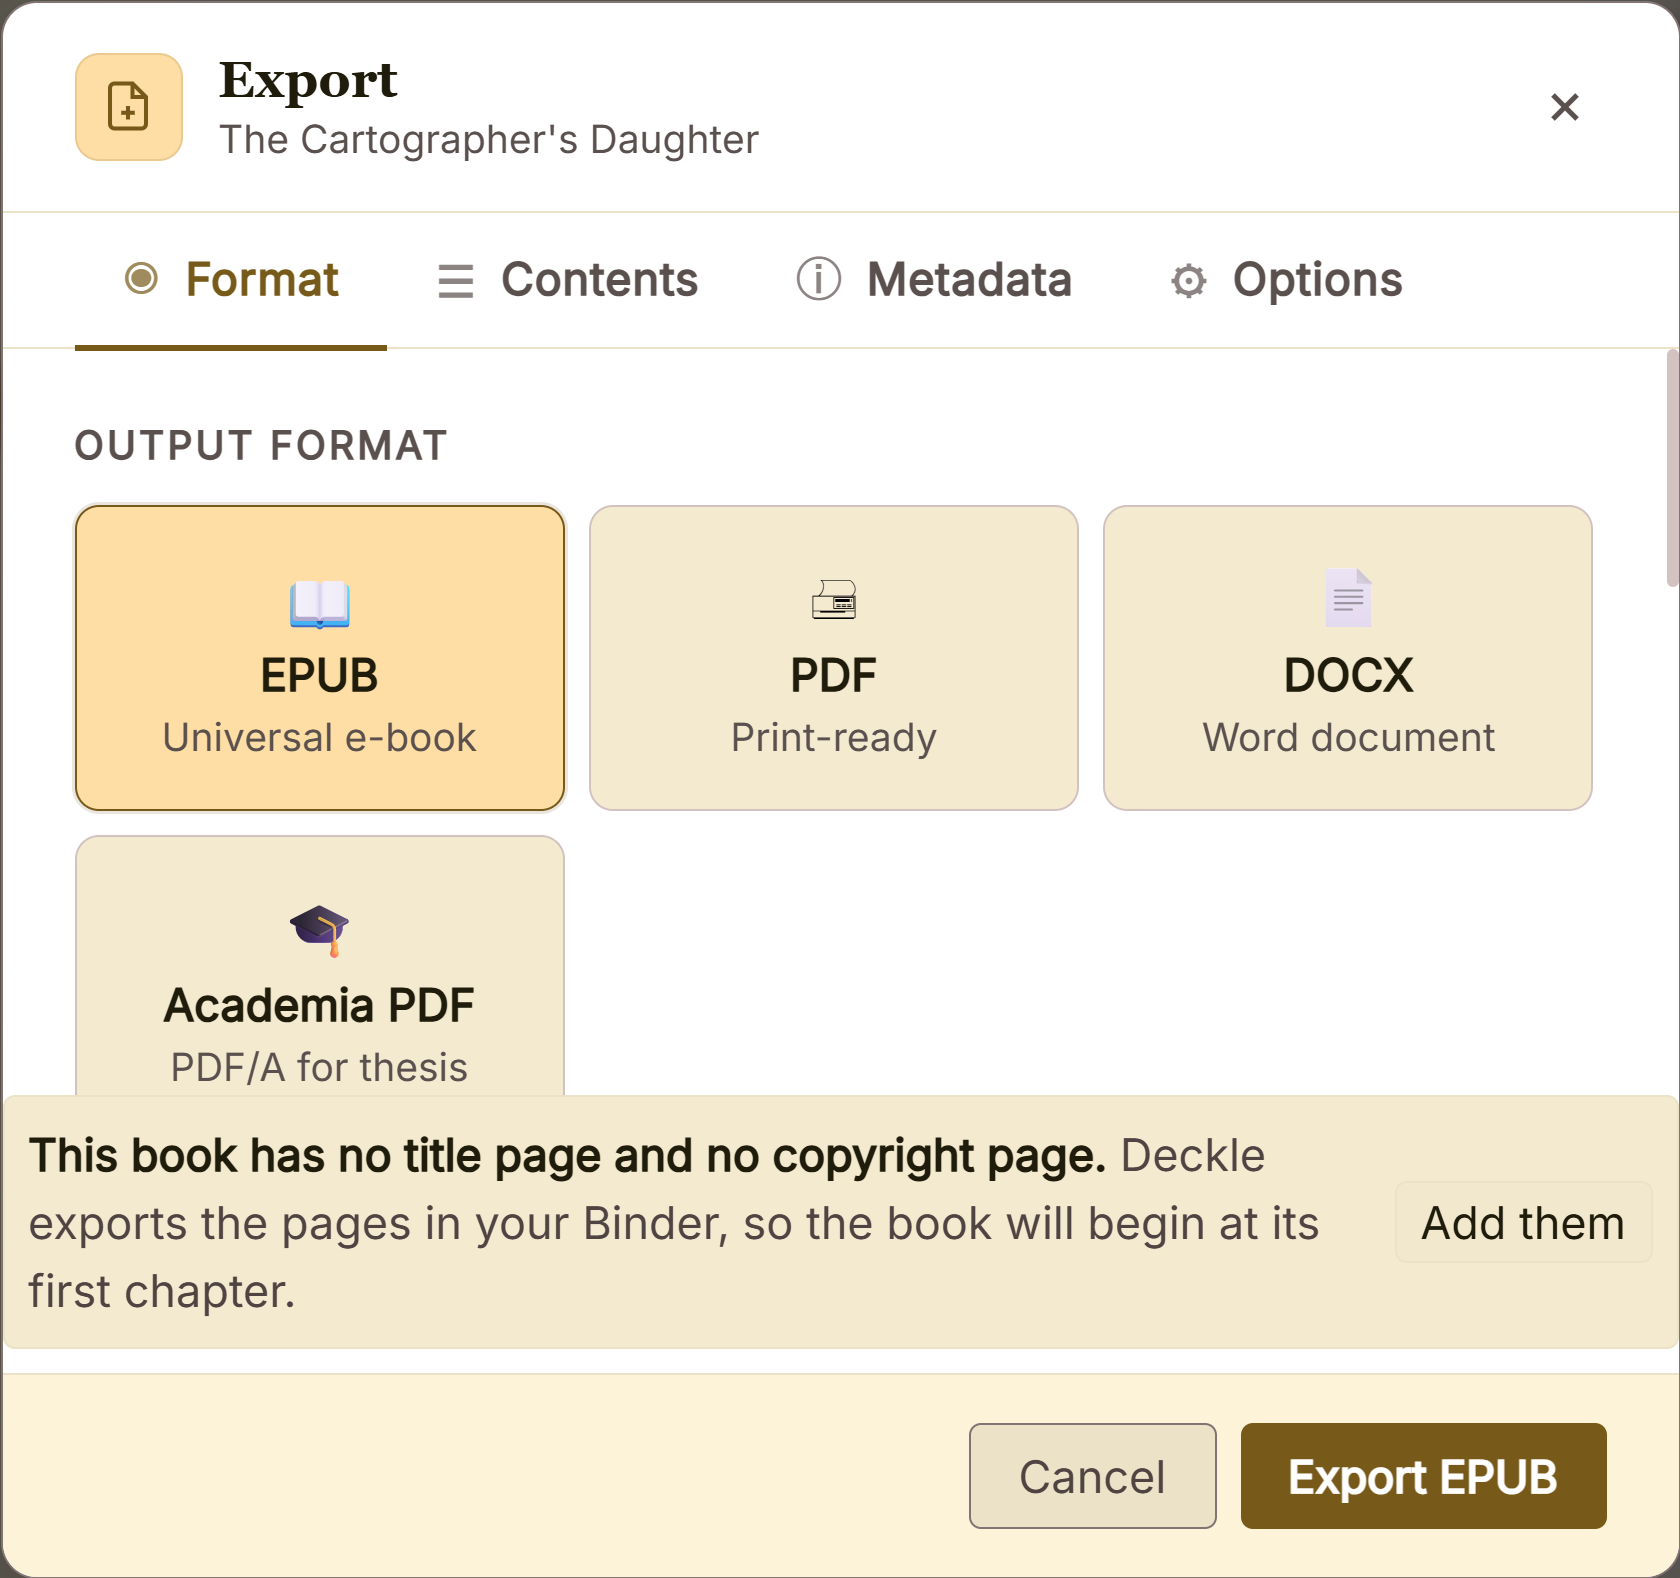 File > Export…: one window in place of Compile
What you would give up. Scrivener's Compile is far more configurable. One project can hold several formats for submission, ebook and paperback, each with its own front matter set. Scrivener also writes LaTeX, Final Draft and HTML, which Deckle does not. Deckle has 8 fixed trim sizes and no custom size. Scrivener projects come into Deckle as a zipped backup (File > Back Up > Back Up To…, with Backup as ZIP file ticked), and the compile settings do not carry across. The full move is in moving from Scrivener to Deckle, and Scrivener's licence and upgrade costs has its own page.
Deckle is a one-time purchase. To try it, click Take Deckle for a Spin on the screen Deckle opens to. There is no card, no account and no time limit. It opens a sample novel with every screen open to explore, and you can restyle it and export real EPUB, PDF and DOCX files. New writing is capped at about 500 words, and new documents and imports are blocked, so a Scrivener import needs the full version.
FAQ
How do I compile in Scrivener?
Choose File > Compile…, pick a file type in Compile for, click a format, check Assign Section Layouts…, and click Compile.
What is the best compile format in Scrivener for a novel?
The manual documents Manuscript (Courier) and Manuscript (Times) for submission, Paperback (6″ x 9″) and Modern for print, and Ebook for ePub. Start from the one that matches your output.
Where do I change compile formatting in Scrivener?
Double-click a layout tile in the Compile window, or double-click a format in the sidebar, to open the Format Designer.
Why are my compile settings not in my new project?
Compile settings belong to each project. Save them into a project template to reuse them.
What is the difference between section types and section layouts?
A section type says what a document is, such as a chapter. A section layout, part of the compile format, says how that type looks.
How do I share a compile format?
Select it in the sidebar and choose Export format…, which saves a .scrformat file. Bring it into another copy with Import Formats… in the Formats sidebar.
Can I compile only some chapters?
Yes. Choose a folder in the Compile dropdown on the Contents tab, or untick Include for the documents you want to leave out.
Sources
All retrieved 2026-10-20.
- Scrivener 3 User Manual for macOS, Literature & Latte, revision 3.5.2-01 (section 7.6 Section Types; chapter 23 Compiling the Draft: 23.1 overview and shortcut, 23.2 formats, 23.3 Layout Preview and Assign Section Layouts, 23.4.1 Contents tab and Front & Back Matter, 23.4.5 Cover, 23.5 Table 23.1 file types, 23.6 saving settings; 24.1 Setting Up the Format; appendix C.2 Section Types; appendix D built-in formats)
- Scrivener 3 User Manual for Windows, Literature & Latte, revision 3.1.6.0-02 (same sections; Ctrl+Shift+E shortcut; Alt for Save in section 23.6; Separators at 24.3, Styles at 24.4, Page Settings at 24.19; Import Formats… in 23.2.5)
- About Us, Literature & Latte (Ioa, Head of Support & Documentation, posts as AmberV; Katherine, Customer Support)
- EPUB 3.3, W3C Recommendation, 13 January 2026
- Scrivener 3, import/export compile formats, Literature & Latte forum, answer by AmberV, 2021-08-31 (types versus layouts; layout assignments cannot be exported)
- How do I control how a Block Quote is rendered with Compile?, Literature & Latte forum, answer by AmberV, 2021-12-05 (the format has the final say on style appearance)
- Change "Chapter" to "Lesson", Literature & Latte forum, answer by AmberV, 2025-07-31 (editing a layout's Title Options prefix)
Scrivener is a trademark of Literature & Latte. Deckle is not affiliated with or endorsed by any product named here.